GO TO PART 1
Okay, In the part 1 we have learned how to make the easy blog. This part I will show you how to..
1. Put the Picture in your blog.
2. Make a link to the destination page or URL.
3. Resize, Color and style of your font.
Let's start.
1. Put the Pictures in your blog
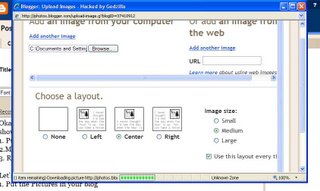
- Click On Add Image BUTTON

- The Popup page will be shown

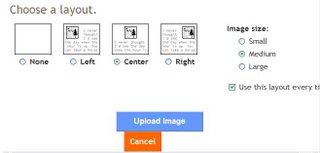
Browse to your picture location and then choose a layout and Image size.

Then Click on UPLOAD IMAGE botton

- Wait for Blogger.com completed loading your image.

- Click on DONE botton. And close window.
LOOK HOW EASY!!!
2. Make link to destination page or URL
- Just type the correct URL name, it will be automatically link to destination URL.
EXAMPLE : I will make link to http://coolonlinebiz.blogspot.com
- Drag on your image or font that you want to make link to and then click on Link Botton
Example : If you want to make a link to http://coolonlinebiz.blogspot.com

- Drag on Image that you want to make link to.
- Click on LINK botton above and then put URL name into the box that show up. and then Click OK.
3. Resize, Color and style of your font.
Example Resize
- Drag on the word that you want to resize and then click on Font size bar above.
Example Color
- Drag on the word the your want to make color, and then select the Font color on tool bar above
Font style
- Drag the word that you want to make style of, and then select Font style on tool bar above. Also Click on "b" for BOLD STYLE. "i" for Italic style.


2 comments:
Thanks for the great insight!
Here's something that your readers can probably use:
Get a Free Download For
An Amazing Report ($17 Value) Now While It's Still
Available: "The 7 Hidden Principles Of Super Affiliate Marketing!"
Thanks for the great insight!
Here's something that your readers can probably use:
Get a Free Download For An Amazing Report ($17 Value) Now While It's Still
Available: "The 7 Hidden Principles Of Super Affiliate Marketing!"
Post a Comment